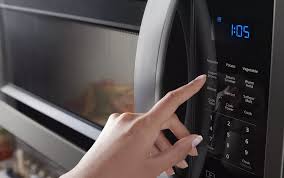
There’s nothing quite like the modern convenience of a microwave oven. It’s the unsung hero of the kitchen, ready to reheat last night’s pizza, steam veggies in a flash, or pop the perfect bag of popcorn for movie night. But what happens when that hero fails? You place your food inside, the turntable spins, the light comes on, the timer counts down… and you’re left with a cold, sad dish. If you’re wondering How To Fix Microwave Oven Not Heating, you’ve come to the right place. It’s one of the most common appliance frustrations, but don’t rush to buy a new one just yet. Many of the causes are surprisingly fixable.
Solving this problem is often a process of elimination, starting with the simplest solutions before moving to more complex components. A little bit of know-how can go a long way. For those interested in maximizing their appliance’s performance, understanding how to save energy with microwave oven is also a key part of being a savvy owner.
Safety First: The Golden Rule of Microwave Repair
Before we dive into the nuts and bolts, let’s get one thing crystal clear: Microwaves can be extremely dangerous to repair. Even when unplugged, a microwave’s high-voltage capacitor can store a lethal electrical charge for hours, or even days.
WARNING: Always unplug your microwave oven from the power outlet before attempting any inspection or repair. Never bypass any safety features. If you are not comfortable working with high-voltage electronics, stop and call a qualified professional. Your safety is not worth the cost of a repair.
To be extra safe, after unplugging the unit, let it sit for at least a few hours to allow the capacitor to discharge. Better yet, experienced technicians manually discharge the capacitor with a properly insulated tool. For the scope of this guide, we’ll focus on diagnostics you can perform, but we will always advise caution.
Why Is My Microwave Running But Not Heating?
When your microwave seems to be working—the light is on, the fan is humming, the plate is spinning—but no heat is being generated, the issue lies within the high-voltage circuit responsible for creating the microwaves themselves. Think of it like a car: the radio and lights might work, but if the engine has a problem, you’re not going anywhere.
Here are the most common culprits, in order of likelihood:
- A faulty door switch: The microwave won’t start the heating process if it thinks the door is open.
- A burned-out high-voltage diode: This component converts AC power to DC to power the magnetron.
- A failed magnetron: This is the heart of the microwave, the component that actually generates the microwaves.
- A faulty high-voltage capacitor or transformer: These components work with the diode to power the magnetron.
How to Fix Microwave Oven Not Heating: A Step-by-Step Guide
Ready to play detective? Grab a screwdriver and a multimeter (if you have one), and let’s walk through the diagnostic process. Remember to unplug the microwave first!
Step 1: Check the Simple Stuff
Before you start unscrewing panels, let’s rule out any simple user errors. It happens to the best of us!
- Check the Settings: Make sure you haven’t accidentally set it to a “timer” only mode or a very low power level. Some microwaves have non-cooking functions that will run the timer and turntable without engaging the heating element. Try setting it to full power for 30 seconds.
- Listen Carefully: Does the microwave sound different? Usually, when heating, you’ll hear a low, steady hum from the magnetron. If that sound is missing, or if you hear a loud, unusual buzzing, that’s a clue that the high-voltage circuit is the problem.
- The Water Test: Place a microwave-safe mug of water inside and run it for one minute. If the water is still cold, you’ve confirmed there’s a definite heating problem.
Step 2: Investigate the Door Switches
Your microwave has several safety interlock switches inside the door frame. Their job is to ensure the microwave can only operate when the door is securely shut. If even one of these fails, the microwave may still light up and spin, but it will not allow the magnetron to activate.
- How to Check: You’ll need to remove the outer cabinet of the microwave to access them. Look for small plastic switches with levers near the door latches.
- Testing: With the microwave unplugged, you can test each switch for continuity using a multimeter. When the switch’s button is pressed (simulating a closed door), the multimeter should show a reading of zero ohms (continuity). When it’s not pressed, it should show infinity. If a switch fails this test, it needs to be replaced. This is a common and relatively inexpensive fix.
Step 3: The High-Voltage Diode
The diode is a small electronic component that acts like a one-way street for electricity. It’s a critical part of the power supply to the magnetron. When it fails, it often “shorts out,” which can cause a loud humming noise and prevent heating.
- Locating It: After removing the cabinet, the diode is typically located near the capacitor and transformer. It’s usually bolted to the chassis on one end and connected to the capacitor on the other.
- Testing: This requires advanced knowledge. A multimeter set to a high-resistance setting can test it. The diode should show continuity in one direction but not the other when you reverse the multimeter probes. A failed diode will often show continuity in both directions or none at all.
Step 4: The Magnetron – The Heart of the Heat
The magnetron is the tube that generates the microwave radiation. It’s the most common cause of a no-heat problem and, unfortunately, one of the most expensive parts to replace. A failing magnetron might also produce a growling sound or a burning smell.
As Sarah Jenkins, a certified appliance technician with over 20 years in the field, warns:
“Testing and replacing a magnetron involves working right next to the high-voltage capacitor. It’s not a job for a beginner. If you suspect the magnetron, my strongest advice is to weigh the cost of a professional repair against the price of a new unit.”
- Visual Inspection: Sometimes a magnetron will show visible signs of failure, like burn marks or a cracked magnet.
- Continuity Test: You can test the magnetron’s filament terminals with a multimeter. There should be a very low resistance, typically 2-3 ohms. Then, test from each terminal to the metal case of the magnetron. This should show no continuity (infinite resistance). If it does, the magnetron has shorted out and must be replaced.
When Is It Time to Call a Professional (or Buy a New Microwave)?
So, you’ve done some digging and think you’ve found the problem. What now?
- If it’s a door switch: This is often a DIY-friendly repair for those comfortable with basic electronics. The parts are cheap, and the replacement is straightforward.
- If it’s the diode, capacitor, or magnetron: These repairs are more complex and dangerous. The cost of the parts, especially the magnetron, can be significant. For example, a new magnetron might cost $100-$150, plus labor if you hire a pro.
Consider the age and value of your microwave. If you have a basic countertop model that’s over five years old, the cost of a professional repair can easily approach or exceed the cost of a brand new, more efficient model. However, if you have a high-end, built-in, or convection microwave, a repair is almost always more cost-effective.
Frequently Asked Questions (FAQ)
Q: Is it worth fixing a microwave that is not heating?
A: It depends on the cause and the microwave’s value. A simple fix like a door switch on a $500 built-in model is absolutely worth it. A failed magnetron on a $70 countertop model is likely not.
Q: How much does it cost to replace a magnetron?
A: The part itself typically costs between $50 and $150. With professional labor, you can expect the total repair cost to be in the $150 to $300 range, depending on your location and the model.
Q: Can a blown fuse cause a microwave not to heat?
A: Yes, but it’s important to understand why the fuse blew. A main fuse blowing usually indicates a more serious underlying problem, such as a faulty door switch or a shorted capacitor, that caused a power surge. Simply replacing the fuse without fixing the root cause will just result in another blown fuse.
Q: Why does my microwave light turn on and turntable spin, but it does not heat?
A: This classic symptom points directly to a failure in the high-voltage circuit. The low-voltage components that run the light, fan, and turntable are working fine, but the components responsible for generating heat (magnetron, capacitor, diode) are not receiving power or have failed.
Q: Is it safe to repair a microwave oven myself?
A: Only if you are experienced and comfortable working with high-voltage electronics and take extreme safety precautions, including unplugging the unit and safely discharging the capacitor. For most people, anything beyond a simple door switch inspection is best left to a qualified technician.
Final Thoughts on a Frustrating Problem
Facing a non-heating microwave can throw a wrench in your daily routine. By following a logical diagnostic process, you can often pinpoint the problem yourself. For simple issues like a faulty door switch, a DIY repair can save you time and money. However, the most critical takeaway is to respect the power inside your microwave. Understanding how to fix Microwave Oven not heating is valuable, but knowing when to step back and call for professional help is even more important. A well-maintained and properly functioning microwave is a kitchen marvel, and getting yours back in working order will make you appreciate its convenience all over again.